
If you’re a fan of delicate, crunchy, and oh-so-sweet treats, then you’ve probably fallen head over heels for macarons. And what’s better than macarons? Pink macarons, of course! These little bites of heaven are not only cute as a button but also packed with flavor and texture that’ll make your taste buds do a happy dance.
Now, I get it. Macarons seem like one of those desserts that only fancy bakeries can pull off. You know, the ones with the perfectly smooth tops, the perfectly matched colors, and that soft, melt-in-your-mouth filling. But I’m here to tell you that you can totally make pink macarons at home without breaking a sweat. Seriously, with the right tips, tricks, and a little bit of patience, you can get the kind of macaron results that make people think you spent hours at a fancy French patisserie.
So, let’s roll up our sleeves and get ready to bake some pink macarons that will knock your socks off!
Table of Contents
Table of Contents
Perfect Macarons
- Total Time: 35 minutes
- Yield: 36 cookies 1x
Description
How to make crispy, crunchy, chewy french macarons! Follow this recipe for tips on how to properly fold macaron batter, avoid hollow shells and other problems.
Ingredients
- 4 ounces almond flour
- 8 ounces powdered sugar
- 4 ounces egg whites aged overnight in the fridge and brought to room temperature
- ¼ teaspoon cream of tartar
- ½ teaspoon meringue powder optional
- 2 ounces granulated sugar super fine
- 1 teaspoon vanilla extract
- ¼ teaspoon salt
- 1 drop gel food coloring optional
White Chocolate Ganache
- 7 ounces white chocolate
- 4 ounces heavy cream
- 1.5 ounces unsalted butter
- 1 whole vanilla bean or 1 teaspoon extract
Instructions
Before you Begin
- Age your egg whites 2-4 days ahead of making your macarons. Crack and separate the eggs and store the whites in a container covered in plastic wrap.
- Take your egg whites out of the fridge 2-3 hours in advance. Room-temperature egg whites whip up better than cold egg whites.
- Begin by wiping your bowls, whisk, and tools down with some white vinegar. This will remove every trace of oil from the surface and help ensure the perfect macaron.
- Preheat your oven to 300ºF (148ºC).
- Trim the parchment paper to the size of your pan so that it fits perfectly inside.
- Place the macaron template under the parchment or make your own template by tracing circles that are roughly 1.5″ wide and spaced about 1″ apart. Turn the parchment over so that the marker does not transfer to your cookies.
- Measure out all your ingredients carefully using a food scale and set them aside. Having your ingredients ready to go will help ensure success.
Making the Macaron Batter
- Place your dry ingredients (almond flour, powdered sugar, and salt) into your food processor. Process for 5-second increments, three times. Shake the container as needed to ensure even mixing.
- Place your strainer over a large bowl.
- Sift the almond flour mixture to remove any large bits of almond. If you have to remove a lot, make sure to add the same amount of almond flour back in so that your batter ratio is not thrown off.
- Place your egg whites, cream of tartar, and meringue powder into the bowl of your stand mixer with the whisk attachment attached.
- Begin whisking your egg whites on medium speed until you reach soft peaks. Medium speed will produce smaller, stronger air bubbles than whipping at high speed.
- Sprinkle in the granulated sugar slowly until it’s all added and continue whisking on medium until you reach stiff peaks.
- Finally, add the vanilla and mix until combined.
- Add your meringue to the dry ingredients and begin using the “J fold” method by making a line down the center of your mixture with the rubber spatula and then up and to the left of the bowl. Rotate the bowl 90º and repeat this “J fold” for 10 strokes.
- Add your food coloring in at this point. Remember, a little goes a long way. Fold two more times.
- Begin testing your batter after stroke 12 for readiness by lifting the spatula out of the bowl to see how the batter runs off the spatula. If the batter stays clumped or does not fall off the spatula, fold it one more time and test again.
- Repeat this process until the batter falls off the spatula in a “V” shape. Another test you can do is to firmly bang your bowl onto the counter to see if the batter settles into itself. If it does, it’s ready. If it doesn’t move it still needs more mixing. Some pastry chefs recommend making a figure 8 with the batter to test readiness but I find this often causes overmixing so looking for the “V” is a safer option.
- Prepare your piping bag with a ½” round piping tip by cutting the end of the piping bag off and inserting the tip into the bag.
- Twist the piping tip and bag together to seal the bottom of the piping bag and then press the bag into the tip so that the filling does not leak out of the piping bag.
- Fold the top of the piping bag down over your hand and scoop the macaron batter into the piping bag with a rubber spatula. Or you can place the piping bag into a tall glass so both your hands are free.
- Lay the bag flat on the counter and push all the batter to the bottom of the piping bag so there are no air bubbles and then twist the top to prevent leaking. Tie the top into a knot if desired.
- When ready to pipe, pull the piping tip out and move the batter down into the piping tip by squeezing the batter gently. Pro-tip: When you are not piping, hold the piping bag straight up to prevent leaking. When ready to pipe turn the bag over and immediately begin piping.
Piping the Macarons
- Hold the piping bag straight up and down over a circle, about 1″ away from the prepared baking sheets.
- Begin squeezing, do not rotate or move your bag.
- The piping tip opening should be touching the macaron at all times.
- Stop piping just inside the circle (at the dotted line if you’re using my template).
- Make a small quick “C” circular motion with the tip to remove it from the piped cookie. Try not to just lift up because this will leave little peaks on top of your cookies.
- After all your macarons are piped, lift your pan up about 6″ and drop it onto your work surface a few times. This helps pop any large bubbles that may have got trapped in your batter pop so they don’t crack your macarons.
- Use a needle or toothpick to fix any bubbles if you still have some.
- Don’t forget to remove the templates under the parchment paper before baking.
- Allow the macarons to sit at room temperature for 15-30 minutes to develop a “skin” on them before baking. You should be able to lightly touch the top of the cookie and the batter will not stick to your finger. Do not leave your macarons out to dry for longer than 30 minutes or the shell can get too thick and your macaron shells won’t develop feet.
- Remove the template and place a small dab of macaron batter under the corner of each piece of parchment paper to keep it from blowing all over the place in the oven.
- Bake the macarons in the oven at 300ºF for 10 minutes. Rotate the pan after 5 minutes to promote even baking as well as let some of the steam out of the oven which helps to prevent cracking.
- Test one macaron by gently lifting it from the parchment paper with a knife. If it releases, your macarons are done. If it’s sticking, continue baking and check every minute until they release.
- Remove the baking tray from the oven and pull the parchment off the pan by sliding it gently onto a wire rack so that your macarons do not continue to bake.
Making White Chocolate Ganache
- Combine your chocolate and cream together in a microwave-safe bowl.
- Heat the mixture for one minute then whisk together.
- Continue heating the mixture in 30-second increments until the chocolate is melted and everything is mixed together smoothly.
- Add the butter and vanilla, then stir together until it’s melted and combined.
- Place the ganache into a piping bag and flatten the mixture out until it is pretty thin.
- Place the ganache into the freezer for about 10 minutes to help it set up.
- Push the ganache to the end of the piping bag with a bowl scraper.
- Cut a small ⅛” hole in the bottom of the piping bag and begin filling your macaron shells with the ganache.
- Place a second shell on top and now your macarons are complete!
Notes
- Egg whites are the main ingredient for making a French macaron. I recommend using fresh egg whites that have been aged in the fridge for 2-4 days. This allows some of the moisture to evaporate from the egg whites and causes the tight proteins in the egg whites to relax. Relaxed protein means stronger meringue that is less prone to over-mixing and cracking.
- Almond flour is different from almond meal so make sure you get the right kind.
- Some pastry chefs prefer superfine granulated sugar for a shinier macaron shell but regular sugar will work as well.
- Cream of tartar is an acid that helps your meringue batter keep its stability and prevents over-whipping. It’s not 100% necessary but it does help!
- Powdered egg whites can help strengthen your egg whites to prevent over-mixing. Again, not 100% necessary but it does help when you’re a beginner.
- A kitchen scale is a must. Some recipes can be converted to cups without too many problems but this is not one of them. Exact measurements are required. You can get a kitchen scale at most department stores.
- Stand mixer or electric hand mixer – This is necessary for mixing your meringue. You could do it by hand but your arm would probably fall off before you got your meringue mixed enough.
- Glass or metal bowl – Plastic bowls hold onto fat particles which can interfere with your batter.
- Pastry bag and medium round piping tip – You will need these to pipe your macaron shells. The exact size of the piping tip isn’t super important, but I typically use an Ateco 804-806.
- Parchment Paper or silicone mat (not wax paper) – I have personally found that parchment paper works best for me when piping out my macaron shells. The paper allows for even baking and they release easily from the paper.
- Two baking sheet pans – You want to pipe all of your macaron batter at once. It will not keep if you leave it in the bowl for too long after mixing.
- Prep Time: 20 minutes
- Cook Time: 15 minutes
- Category: Dessert
- Cuisine: American
Nutrition
- Serving Size: 1cookie
- Calories: 99kcal
- Sugar: 11g
- Sodium: 27mg
- Fat: 5g
- Saturated Fat: 3g
- Unsaturated Fat: 0.1g
- Trans Fat: 0.04g
- Carbohydrates: 12g
- Fiber: 0.3g
- Protein: 1g
- Cholesterol: 7mg
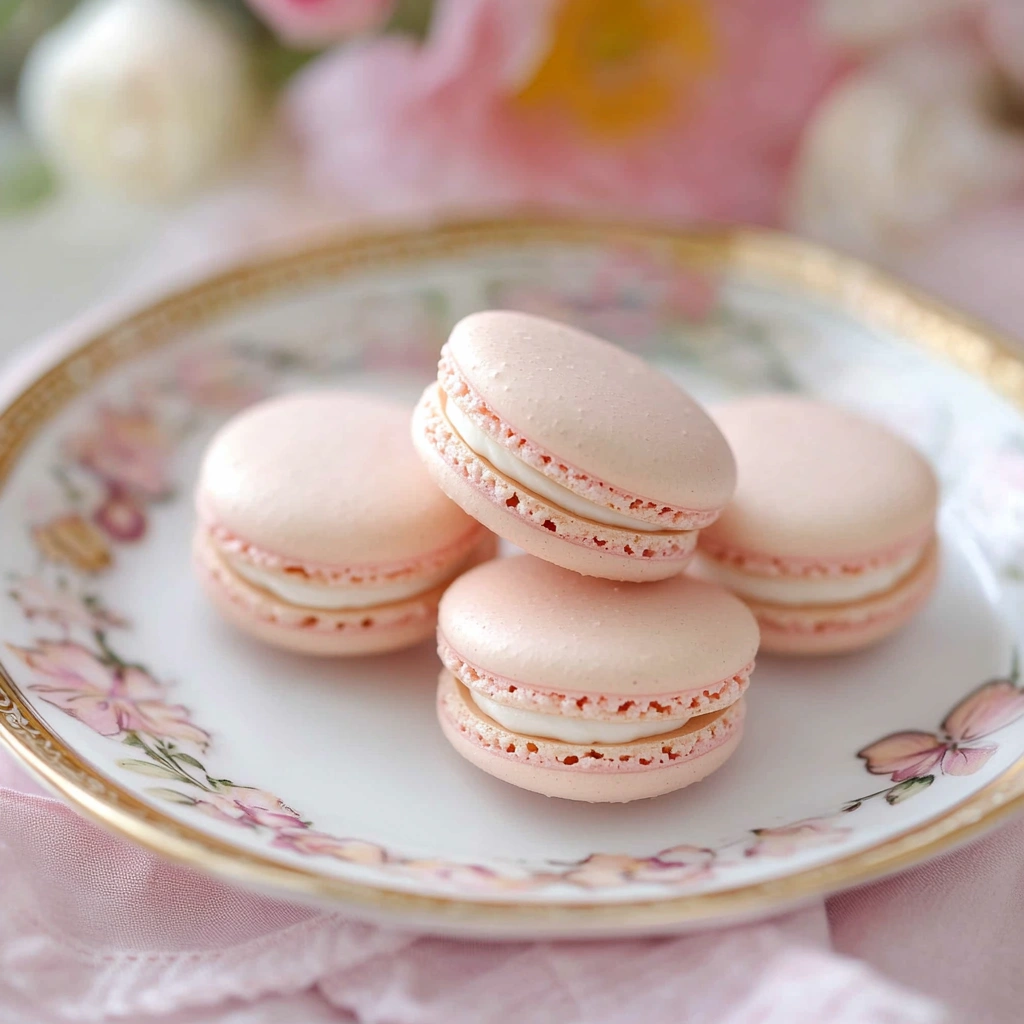
What Exactly Are Pink Macarons?
Let’s start with the basics, shall we? Macarons (not to be confused with macaroons, which are coconut-based) are French meringue cookies made with almond flour, egg whites, sugar, and a filling of your choice. When I say “filling,” I mean buttery goodness like buttercream, ganache, or even jam.
The secret to pink macarons, or any macaron really, lies in the perfect texture and the balance between crunchy and soft. The outer shell should have a delicate crisp, and the inside should be chewy but not too soft. And, of course, the filling must be smooth and creamy. Now, when you add pink food coloring to the batter, it’s like adding a little sunshine to your day.
You know what’s the best part? You can make these as fancy or as simple as you want. Whether you’re prepping them for a baby shower, a birthday party, or just because you’re craving something sweet, pink macarons will always steal the show.
For another delicious dessert, check out these strawberry cheesecake cookies—a sweet treat you won’t want to miss!
Ingredients You’ll Need
Before we get started, let’s take a look at what you’ll need. I promise, nothing too crazy here—just simple ingredients that are easy to find in your local grocery store.
For the Macaron Shells:
- 1 cup powdered sugar
- 1/2 cup almond flour (be sure it’s finely ground for the smoothest texture)
- 2 large egg whites (room temperature works best)
- 1/4 cup granulated sugar
- 1/2 tsp vanilla extract (or almond extract if you’re feeling fancy)
- Pink food coloring gel (I like to use gel because it doesn’t mess with the texture as liquid food coloring can)
For the Filling (Buttercream):
- 1/2 cup unsalted butter (room temperature)
- 1 cup powdered sugar
- 1 tsp vanilla extract
- 2 tbsp heavy cream
- A pinch of salt
- A few drops of pink food coloring (optional, but it makes everything look pretty!)
How to Make Pink Macarons: Step-by-Step
Alright, now that we’ve got our ingredients ready, let’s dive into the step-by-step process. Don’t worry—it might look long, but trust me, it’s easier than it seems.
Step 1: Prep Your Baking Sheets
First things first: prep your baking sheets. Line two baking sheets with parchment paper or silicone mats. If you want perfectly uniform macaron shells (and who doesn’t?), you can even trace circles onto the parchment paper as guides. I usually use a pencil to draw circles about 1.5 inches in diameter. Then, flip the paper over so the pencil marks don’t touch the batter.
Step 2: Sift the Dry Ingredients
Now, sift the powdered sugar and almond flour together into a large bowl. I know, it’s a little extra, but trust me, this step helps to avoid lumps and gives your macarons that smooth, silky texture. You can use a fine-mesh sieve or a sifter for this. The smoother, the better!
Step 3: Whisk the Egg Whites
In a separate clean bowl, beat the egg whites with an electric mixer or stand mixer until they start to get frothy. Once frothy, gradually add the granulated sugar while continuing to mix. Keep going until stiff peaks form—this means that when you lift the beaters out of the bowl, the egg whites will stand up straight without collapsing. Tip: Don’t rush this part! Properly whipped egg whites are the key to getting the right texture for your macaron shells.
Step 4: Add the Pink Color
Now, it’s time to make your macarons pretty in pink! Add a few drops of pink food coloring gel to the egg whites. You can add more or less depending on how vibrant you want the color to be. Mix it in gently. Just a heads-up—gel food coloring is much more concentrated than liquid food coloring, so go slow!
Step 5: Combine the Wet and Dry Ingredients
Once the egg whites are whipped and your pink food coloring is mixed in, it’s time to fold everything together. Gently fold the dry ingredients (almond flour and powdered sugar) into the whipped egg whites using a spatula. Important: Don’t mix too aggressively. You want the batter to be smooth and glossy, but not runny. When you lift the spatula, the batter should fall back down in a smooth ribbon.
Step 6: Pipe the Macaron Shells
Transfer the macaron batter to a piping bag fitted with a round tip. (A Ziploc bag with the tip of the corner cut off works in a pinch!) Pipe small circles onto the prepared baking sheets, using the guides you drew earlier. Keep them about an inch apart, as they will spread a bit.
Step 7: Tap and Rest the Macarons
Once all the macarons are piped, tap the baking sheet on the counter to release any air bubbles. Let the macarons rest at room temperature for about 30 to 60 minutes. This helps to form a skin on the top of the shells. When you lightly touch them, the batter shouldn’t stick to your finger.
Step 8: Bake the Macarons
Preheat your oven to 300°F (150°C). Bake the macarons for 12-15 minutes, rotating the sheet halfway through. You’ll know they’re done when they don’t jiggle and the “feet” (the little ruffled edges at the bottom of the shells) are formed.
Step 9: Cool and Fill
Once baked, let the macarons cool completely on the baking sheet. While they cool, make your buttercream filling. Simply beat the butter, powdered sugar, vanilla extract, heavy cream, and a pinch of salt until light and fluffy. You can also add more pink food coloring if you want the filling to match the shells.
Once your macarons are cool, pipe a little buttercream on the flat side of one macaron shell, then top with another shell. Gently press together to sandwich them.
Step 10: Let Them Rest (Trust Me)
I know, I know—it’s hard to resist, but let your filled macarons rest for at least 24 hours in the fridge before eating. This allows the flavors to meld together and gives you that perfect chewy center. But honestly, if you can’t wait, I totally get it!
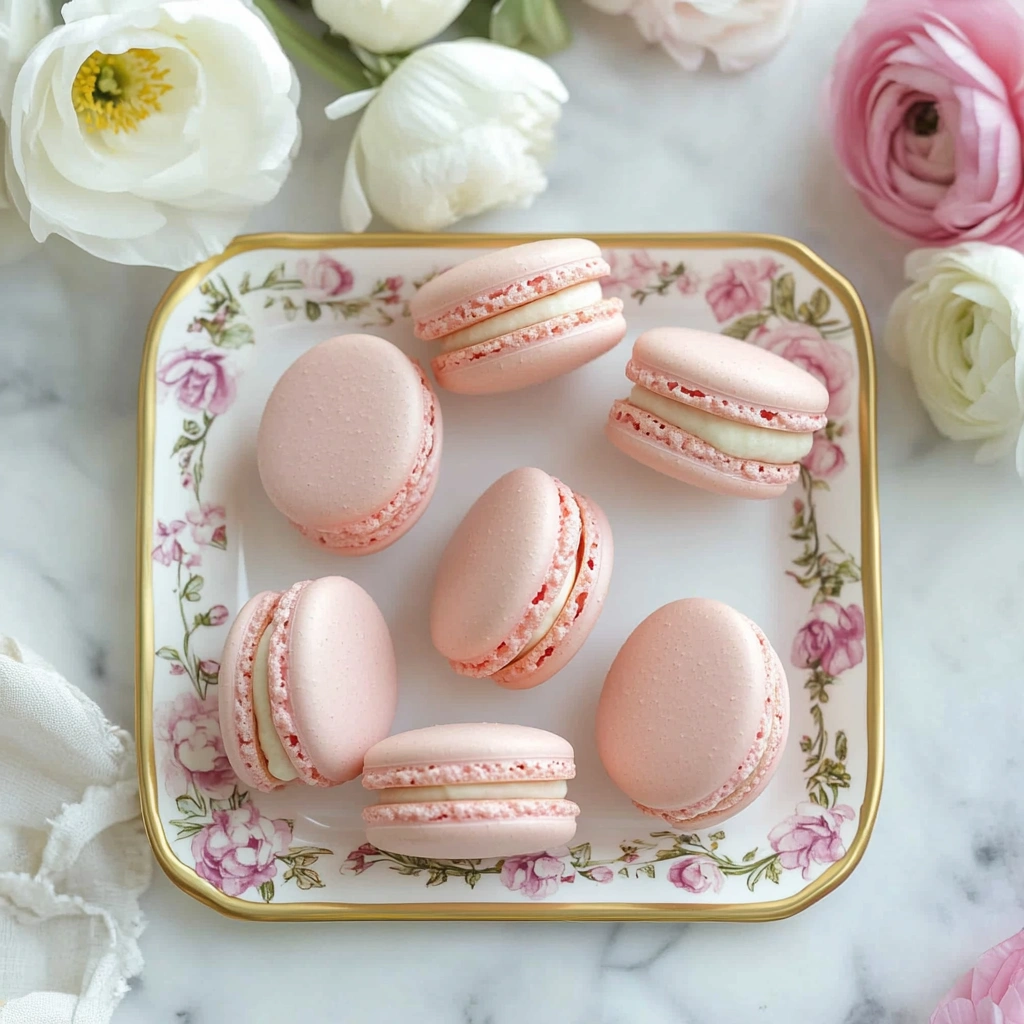
Pink Macarons: A Perfect Treat for Every Occasion
Pink macarons aren’t just about looking pretty—they’re incredibly versatile, making them the perfect treat for almost any occasion. Whether you’re planning a baby shower, celebrating a birthday, or just want something sweet to enjoy with your afternoon coffee, pink macarons will fit right in. They can be customized to match any theme, too! Want a more romantic touch for your anniversary? Add a rosewater filling. Hosting a garden party? Try a hint of lemon or raspberry in your buttercream. The pink color adds that extra pop, making them even more special.
Not only are they delicious, but pink macarons also make for stunning dessert table centerpieces. Picture a beautiful platter of pink macarons at your next event, arranged in a neat row or in a big tower, waiting to be devoured. Trust me, These little treats add a delightful touch to any dessert spread—no fancy decorations required. Simple, elegant, and oh-so-tasty.
How to Get That Perfect Macaron “Feet” Every Time
The holy grail of perfect macarons is achieving those lovely, ruffled feet around the bottom of each shell. You know, those little frills that form as the macaron rises in the oven. It’s a sign that you’ve nailed the texture and baking process, and let’s be honest, they’re the most satisfying part of baking macarons!
But getting those feet, especially with delicate pink macarons, can sometimes be tricky. So, let’s break down how to make sure you get them every time. One key tip is to let the macarons rest before baking. This helps to form a skin on top of the batter, which is essential for getting those feet to form correctly. Also, try not to underbeat your egg whites. Overbeating can cause cracks, and underbeating can make your macaron batter too runny to form a stable structure.
It’s also super important to get the oven temperature right. Too hot, and your macaron shells will puff up too fast and crack. Too cool, and they might not rise enough to form feet at all. So, make sure to stick to a low and slow bake, around 300°F (150°C). And, don’t forget to rotate your baking sheets halfway through baking for even heat distribution.
Pink Macaron Fillings: Get Creative!
While the classic buttercream filling is a fan favorite, don’t be afraid to think outside the box when it comes to filling your pink macarons. You can easily customize your fillings to match the flavors of your shells, making them a unique treat for your guests or just for you!
For a fruity twist, consider raspberry ganache or a strawberry jam filling to complement the pink color. If you’re craving something richer, a chocolate hazelnut spread or even a decadent salted caramel filling could work wonders. Personally, I’ve been known to make pink macarons with a lemon curd filling during the spring months, when fresh citrus is in season. The tanginess pairs beautifully with the sweetness of the macaron shells, and it gives your taste buds a refreshing surprise.
If you’re in the mood for something ultra-indulgent, you can even make a whipped cream filling flavored with vanilla, mint, or chocolate. The key here is to pick a filling that won’t overwhelm the delicate sweetness of the pink macaron shells, but rather complements them.
Why Pink Macarons Are So Popular
Pink macarons are more than just a delicious treat—they’re also a visual showstopper. Their delicate color, combined with their smooth, glossy surface, makes them incredibly Instagram-worthy. We’ve all seen those photos of perfectly arranged macarons in a rainbow of pastel colors, but pink seems to steal the spotlight every time.
But why is pink the go-to macaron color? Well, beyond the aesthetic appeal, pink often carries a sense of celebration and joy. Think about it—pink is the color of roses, the classic color for baby girls, and a color that’s synonymous with sweetness and romance. It’s no wonder that pink macarons have become a symbol of indulgence and luxury in the pastry world.
Whether you’re treating yourself to a moment of sweetness or gifting a box of pink macarons to a loved one, these treats bring a sense of delight and beauty to any occasion. They’re also a great conversation starter! Let’s face it—if you bring out a plate of perfectly crafted pink macarons, you’re bound to get a few “wow” reactions from your guests.
Making Pink Macarons Your Own: Customization Tips
One of the coolest things about making pink macarons is how easily you can customize them to your liking. Don’t feel like you have to stick to the standard pink and white theme. You can get as creative as you want with these little treats.
Want to get that ombre effect? Simply adjust the amount of food coloring you add to each batch of macaron batter, creating a gradient of pink shades. Or, if you’re feeling extra festive, why not add a hint of edible glitter or dust your macarons with some gold or silver shimmer? The options are endless!
Another fun customization option is in the flavoring. You can mix up the pink shells by adding rose water, strawberry puree, or even a little bit of raspberry powder to the batter. These ingredients not only add beautiful color but also bring new layers of flavor to your macarons. If you want to make them extra special for a certain event, try matching the flavor to the theme. For example, for a baby shower, a vanilla and raspberry combo might be just the ticket.
The Macaron “Ageing” Process: Why Waiting Pays Off
So, you’ve baked the macarons, filled them with their delicious buttercream or ganache, and now you’re tempted to dig in. I get it, you’ve worked hard, and they look amazing! But—here’s the secret—waiting a day or two before eating them is actually one of the best things you can do for your pink macarons.
This period allows the flavors to meld and the shells to soften ever so slightly, making the texture much more balanced. The chewy center that macarons are famous for really develops during this time, and you’ll notice the filling is even more creamy and smooth. If you can resist eating them right away, they’re even better the next day! I promise, it’s worth the wait.
FAQs
Why did my macarons crack?
If your macarons cracked, it’s likely that they were overbaked or the oven temperature was too high. Macarons need a gentle, consistent heat. Try lowering the temperature slightly and checking on them earlier.
Can I make macarons without almond flour?
Traditionally, almond flour is essential for macarons. You can substitute with hazelnut flour for a different flavor, but almond flour is the best for the right texture.
How do I know if my macarons are baked properly?
Look for feet (the little ruffled edges at the bottom of the shell) and a slight jiggle when you gently tap them. If they’re too wobbly, they’re undercooked; if they’re completely firm, they may have been overbaked.
Can I freeze my macarons?
Yes! You can freeze the macaron shells for up to a month. Just make sure they’re well-wrapped to avoid freezer burn. You can fill them before or after freezing!
Conclusion
And there you have it—everything you need to know about making the perfect pink macarons right in your own kitchen! While these little treats might seem intimidating at first, they’re totally doable with the right tips and a little patience. From the perfect texture to that gorgeous pink color, each step brings you closer to a batch of macarons that will have everyone asking for the recipe (trust me, they will!).
Whether you’re making them for a special occasion or just treating yourself to a delicious dessert, pink macarons will never disappoint. They’re the kind of dessert that not only tastes amazing but looks impressive enough to make you feel like a pro baker. Plus, with endless filling options and customization ideas, you can make each batch uniquely yours.
So, get in the kitchen, put on your apron, and start baking! With a little practice, you’ll be whipping up perfect pink macarons like a French pastry chef in no time. And remember—patience is key! Let them rest, let the flavors meld, and enjoy every bite of these delightful, sweet treats.
Want even more delicious ideas? Check out our Pinterest page for mouthwatering recipes and kitchen tips!
6 thoughts on “How to Make Perfect Pink Macarons: A Step-by-Step Guide”